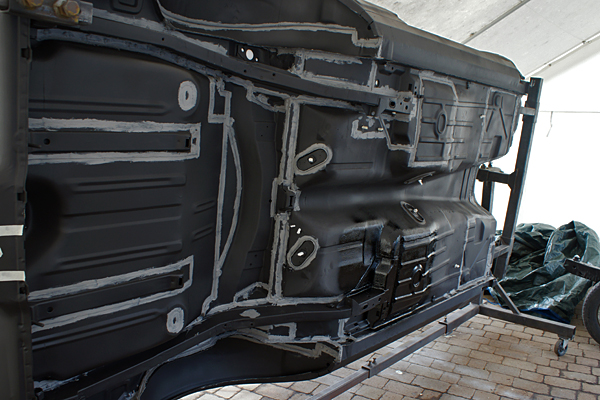
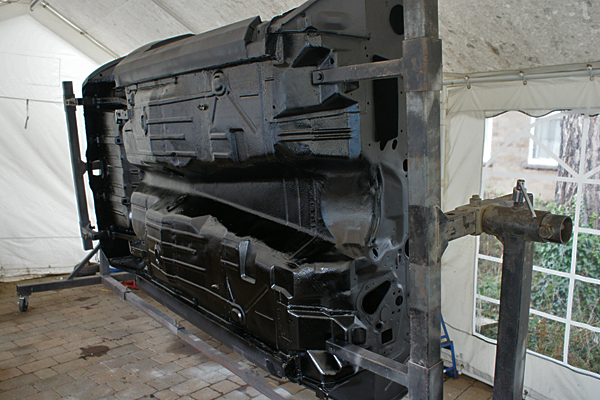
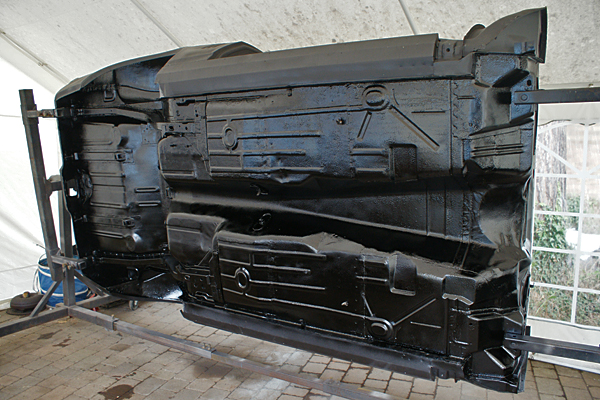
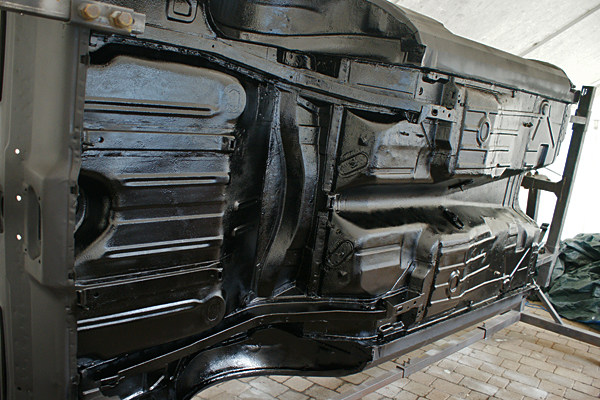
All the welds and joins have been sealed with a brush-on sealer. I started off neat, but ended up just lathering it on.
Then I used Dinitrol 4941 underseal applied with a shutz gun. I’ve just done the one thick coat.
Tomorrow I’ll give the coating a look-over once it’s dry and hopefully (if everything is fine) mount the body back to the rear axle and subframe.…
Archive:
Body
Finally… an update!
So, where the car stands… 2 noise complaints from the council down the line, all the grinding of welds is done. The body and panels have been shotblasted again and not by a cowboy with an air compressor and a bucket of sand, this time hopefully by a professional. Everything is primered in Eastwood epoxy.
Before:
During:
Now:
The subframe has been fully rebuilt with new…
Passenger side door skin (almost) on
First was to get the door off the car, and then remove the existing remnants of skin. The easiest way to do that was to just grind away at the folded edges… So, the left, right and bottom edges of the skin need to be ground down.
… but no need to do the top edge, as the whole support rail on the top side of the skin is replaced…
… and the left rear quarter panel. (And door skin, sort of)
So today the driver side quarter was finished, cut to size and shape, and tacked into position.
First was to cut away some more of the old quarter. I cut an inch below the top edge and about two inches from the door. A centimetre above the lower contour line. And at the back end there’s about an inch of wrap around. I also painted (with POR-15) some bare…
Right rear quarter is in place, looking good…
Today got the right hand rear quarter tacked in place. With the quarter on it’s starting to feel like a car again!
Also started cutting the left hand quarter to shape, and that should be tacked in place tomorrow. I’ve taken some in-progress pictures for the left hand side so I’ll post them soonish.…
Left side rear end rebuilt
Since the last post… New sheet metal for the shock mount, trunk pan extension, quarter filler panel, and inner and outer wheelhouses… and rebuilt structural shock mount area.
I’ll add some more detailed step-by-step pictures shortly.
Still a lot of grinding, welding and more grinding and welding to do……
Driver floor now exists.
Here is (what remains of) the original driver side floor. Somewhat lacking in metal.
The replacement pan to be cut on the black line. And positioned in situ. The panel doesn’t fit too well; the recesses do not line up with the originals under the car… It’s as if everything needs to be shifted half an inch to the left but the left edge of the pan is restricting…
Rear seat rust repair.
Was just going to do a small patch job to the side of the support plate (it’s the plate that the traction arm bolts to from underneath). But thought I had better remove the plate and see the extent of the damage… It was pretty ugly underneath, with a lot of metal rotted to nothing and a fair few pinholes. So it’d be best to do a larger patch panel.…
And the second floor is in.
There were too many little rust holes to patch up, so the whole floor is to be replaced. First was to decide and mark out how much of the old floor to cut out.
Then, the cut out section is overlaid on the new floor pan and drawn around. Then enlarge the outline by about an inch or so all around and cut out the new pan.
The…
The first floor in.
Welded the rear end section a bit more, but have decided I’m going to go round and do all the welds in one go (a few will be done when installing the panels to hold them in position and for body strength)… so I will proceed with installing more panels. Today I put in the new right side rear floor pan. This was very straightforward… Cut the old one out,…