
Good to be back!
I hadn’t taken a break from the car, just the website (minus the slight redesign). That was down to having nothing news-worthy to mention. Just problem after problem after problem. I’m now left with (hopefully) just the one problem which will (should) be simple to fix. I’ll make my way to that, after filling in on what I’ve been up to…
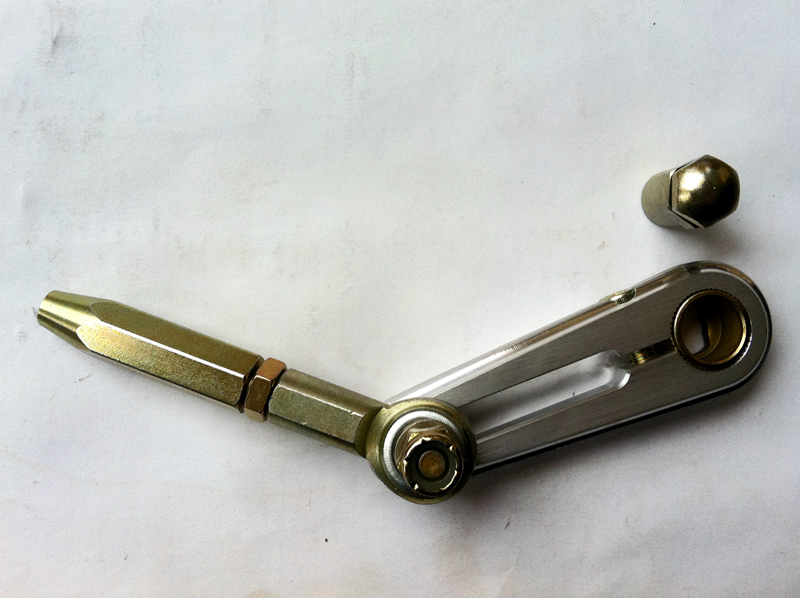
So, I drove it! This entailed a load of work, including sorting out the brake lines, which were a pain to fit, despite being a set designed to fit. I also tried a new Lokar throttle cable instead of the stock solid linkage… but hated it, so reverted almost immediately to the stock linkage, which with new return springs feels very direct and smooth. One new part I really liked is the Lokar transmission column shift linkage, it was easy to cut and bend to fit, and functions much more simply, and occupies a lot less space than the stock linkage. This was a problem with the stock linkage; with the Doug’s headers there was no room for the linkage bracket to mount to the subframe. Last thing was to connect up the driveshaft. I had to end up re-using the original U bolts with new nuts. The car was now driveable. However, there were some big problems


The problems!
I say I drove it… I was ‘driving’ with the brake pedal. What I was doing was stopping the car moving itself. As soon as it was shifted into gear, off it went. The engine would stall when shifted into gear, so the idle speed had to be increased to prevent this. In gear it wasn’t idling extremely high, but definitely a bit. It didn’t matter what gear was selected, drive or reverse, the car would lurch off from the spot, and it felt moreso than a usual auto crawl. I expected problems with the trans before even putting it and the engine back in. Not for any real reason, just since the car was shipped here on day one, I have never driven it. The brakes would barely stop the rolling wheels in the air, plus having nowhere to drive it without registration and MOT, meant the transmission was unproven. Add to this the fact that it’s the only major component with absolutely no attention paid to it.
The trans and torque converter was suspected to be locked up. Seeing this as an excuse to buy a part desperately wanted, a 3-speed transmission was purchased. The engine would have to be pulled to rebuild the original transmission and replace the torque converter, so it seemed pointless to not replace it with a superior model. The transmission purchased was a TCI StreetFighter TH350 with an 1800 stall TCI torque converter.
The engine and transmission out gave access to the bulkhead, so this was opportunity to properly paint it. Whilst waiting for the paint to arrive I decided to change head gaskets, simply for something to do, nothing more. But, to my dismay and somewhat horror, noticed one cylinder had not been firing, or very sparsely if it had. 7 of the 8 chambers were sooted up and black, this one, number 8 was plain cast iron. Same for the valves, the others were burnt or blackened, these were as shiny as the day the heads were put on the block. I had earlier thought it weird that the exhaust port for this cylinder had not discoloured the paint on the head like all the others, this port was still blue unlike all the others brown, but thought nothing of it. I knew the problem wasn’t electrical, the plugs and leads and distributor had all been tested previously, so it was timing. Or fuel delivery – but no.


Engine troubles!
Incorrectly thinking that Pontiac rockers were not adjustable (more on this later), I thought I must be out with the timing chain just slightly to miss only one cylinder (?!). So dismantled the front of the engine to find that, after some confusion over possibly being 180 degrees out (not possible), no, the timing chain was perfect. What now? The only thing I could think of was bad rings on the one cylinder. So mounted the engine on the stand and dismantled it. I couldn’t easily get the same brand/design as the existing rings, so I went ahead and changed rings on all 8 pistons. As it was stripped this far, I thought might as well rebuild the whole thing, and got a set of main and rod bearings along with the new rings. Within a couple days the engine was assembled again. Except, D’oh! For the second time running with this engine, I forgot to install the oil pump drive shaft, so not being excited by the thought of taking off the newly sealed oil pan, I ground off the locating lugs and slid it in from the top. May be frowned upon, I don’t know.


Shiny paint!
In-between this and waiting for the transmission (and other goodies) to arrive, the bulkhead/firewall was painted. This meant thoroughly degreasing with Eastwood PRE paint prep, before scuffing up with 3M red Scotch-Brite pads, and then sealing all the seams with a PU sealant, and I also used a brush on sealant. Then, the paint went on – Eastwood Chassis Black Extreme Satin. This was exciting it was the first time my new air filter/oil/dirt/water trap was used. I also painted the insides of the front fenders, the front wheelhouses and a few other parts at the same time.


The new transmission!
The transmission arrived from the states within a few days (ordered from Summit, delivered by DB Schenker) and this was promptly installed on the engine. I also got a new TCI flexplate. The recommended quart of trans fluid was poured into the torque converter before sliding it onto the transmission, making sure it was properly and completely seated. Then with the help of extra hands the transmission was offered up to the back of the engine and loosely bolted into place, making sure the trans casing was flush with the block before bolting up. Then, the torque converter was bolted to the flywheel, being pulled slightly out of the transmission in doing so. The engine and trans was then planted back into the car.


A slight deviation…
Other things that were ongoing at this time was the general restyling of the engine. I was never fond of the way the engine looked, so opted to try and give it a more pleasing appearance – in my eyes this actually meant something more stock looking. The intake manifold was painted engine blue with Bill Hirsch engine paint (they don’t recommend a primer on cast aluminium so we’ll see how that holds up). New Accell spark plugs (binning the cheap NGK ones I had previously used), new custom cut Mallory yellow plug leads, stock height valve covers (the tall height would not have fitted anyway with the power brake booster and windscreen wiper motor installed), a black air cleaner lid (with a custom decal from eBay to go on it, probably). Also installed was a new distributor (the old one was a bit wobbly) – the FlameThrower Billet Plug’n’Play dizzy (with Ignitor III module) by Pertronix. White tips were painted on the fan, for fun. The radiator shround was installed; I could not locate a new one anywhere so had to reuse the old scratched one. This meant sanding and painting with plastic paint (I tried everything from peanut butter to boot polish to bring the old plastic back to new, but nothing was satisfactory). I also discovered here that the radiator sold by Summit as a direct replacement, is actually 2″ narrower than stock, becasue of this I’ve had to cut a cutaway for the top hose outlet and also the drain plug.


Back to it!
Hooked everything up. All the lines; fuel, transmission, coolant hoses, brakes and electronics etc. and filled up with fluids. I’ll make a note here, that surprisingly the transmission will hold about 11 litres – quite a lot, I certainly thought something was wrong, when the instructions say add 4 litres then just ‘top up’ when the car is idling! But that’s jumping ahead… The engine would not fire. At all. But I was getting spark at all 8 and fuel was making its way in. So, I pulled the plugs and tested compression. No compression. At any cylinder. Bugger!
Compression and rockers…
Please don’t be the rings! Luckily, it wasn’t. Me thinking the Pontiac rockers were not adjustable was obviously wrong… All the rocker stud nuts were tightened to 20 ft lbs as per the shop manual and everywhere else I read, but this was evidently too much – slackening them all off til they were all loose, allowed the engine to fire up straight away. Apart from the knocking of the loose rockers the engine sounded perfect! It actually sounded noticeably different, better, to before, probably due to it now firing on 8, not 7, cylinders. (This has now been confirmed, the exhaust ports have all discoloured and spark plugs are all identical looking). To do now was to get the rockers properly adjusted. I found a couple different methods online and they seemed very thorough and I thought they’d be sure to work. They both basically involved turning the engine over a bit at a time, to get certain valves on the most closed portion of the cam lobe possible, and tightening those rocker nuts until the slightest bit of resistance to twiddling the pushrod was felt, and then an extra quarter turn of the nut to tighten. But this resulted in compression in about half the cyclinders, and no compression in the others (tested using the thumb-plug method). I needed to back off the nuts a good half turn or more to get compression. I found another method, the author stated it as the ‘dirty’ method and this was an understatement. It involved running the engine with the valve cover off and tightening the nuts until the knocking sound stopped. Towels were draped everywhere, and even using a valve cover with just the top cut off to allow access, to prevent splashing, oil still went everywhere. Despite being ridculously messy, this did have the advantage of ensuring the cylinders still fired with the adjustments. With them all adjusted, I thought I’d try and determine the torque setting, worryingly, it’s rather low at about 10 ft/lbs, tightening anymore than this though results in lost compression in the corresponding cylinders. It’s a bit puzzling. When the engine was rebuilt the first time the nuts were tightened to 20 ft/lbs and this seemed to be correct, I think it may be down to resuing the locking nuts, but really not sure why at all.

Note, I now think this, the rocker adjustment, was the only thing wrong with the engine before when it was running on 7 cyclinders, and the last 2000 words and countless man hours could have been avoided. The lessons you learn…
Engine troubles part II!
Now, with the engine finally running more problems cropped up. Idling in particular. The idle is lopey it frequently surges up 200 RPM and then back down to a normal reading. When warm the car will idle at around 750RPM (but still surges up to almost 1000), but when cold the revs, with the choke on, need to be considerably higher to maintain idle. The engine also randomly stalls. It also stalls when pumping the brakes, and the brake feel stupidly spongy. It stalls when shifting into gear with the brakes applied. Sounds like a vacuum leak, and fingers crossed that’s all it is. Hooking a vacuum gauge up, shows that the vacuum is very low at idle, at around 10 in/Hg, down from the normal 17-18 in/Hg. To try and locate the leak I sprayed carb cleaner with the engine idling. Carb cleaner really doesn’t agree with the Bill Hirsch paint, by the way, I now have peeling paint all over my intake manifold! But, I located a definite, and the only, leak at the underside of the carb to manifold gasket, just on the driver-hand side. The revs consistently and reproducibly pick up 200RPM or so when the aerosol is sprayed here. This is understandable, this gasket has been reused a number of times. I tried spraying a copper sealant on the gasket and reinstalling, and also tightening the carb bolts, but no difference.
I decided I’d try and drive it again… with the new transmission and torque converter I get exactly the same problems as at the start of this article. The car drives itself when shifted into gear, and stalls under load. The revs drop a LOT when shifting into gear. A lot being around 400, no wonder the engine stalls. A vacuum leak explains a lot of the problems, I’m not sure it explains all, but I’m hopeful fixing it, will fix all the issues I’m experiencing.
Where we stand!


Where I am now… I have been waiting for the last week and a bit for a carb rebuild kit (for spares, but who knows, I may need to rebuild…) and a spare gasket from Cliff Ruggles. It should be here any day now – first thing to do is to replace the gasket on the car with the new one. I’m optimistic this (and a thorough clean of the mating surfaces) abolishes the vacuum leak, and the engine idles steady, the brakes work, the transmission shifts stably, and thus the car is driveable.
But we’ll see!
Oh boy. Stock pontiac heads are non adjustable that is why you torque the bolts. The heads you have sound like they have adjustable rockers now . Do not torque the rocker nuts if this is true! With the engine off turn the engine over till the intake valve on #1 is closed. Back the rocker nut off till you can turn the push rod with your fingers and you feel no resistance . Then comtinue to turn turn the rod with your fingers while till you feel resistance from you tightening the rocker nut. Tighten it a 1/4 turn extra and move on to the next valve. Make sure the next valve is all the way closed. I wish I was there it is hecka easy. You just need someone there to show you how sometimes. My pops showed me when I WAS 12. Do each valve one by one. If you don’t get the adjustment right eventually your gonna smoke your cam .Good luck
Thanks, good info. But, I did do exactly that! And a second time, a variation of the same method. The problem was both times the extra quarter turn after the first very slightest bit of resistance was felt. It was too tight, and I lost compression in all cylinders. So to get the thing to work I’ve got the rockers too loose, at the point where there is just a tad of resistance and no extra turns.
I will probably be getting some Magnum rollers and new pushrods along with some poly-locks, so will definitely be setting them up properly soon.
Thanks
It’s so very cool to see you bringing this car back to life. I also have a 1967 Firebird that started in a very similar condition to yours. Mine is also a 326 and was originally Signet Gold. I would call mine 98% complete now and I have driven on the road for the first time just last week. I did not keep the original color but instead painted it Mariner Turquoise. I will be following your blog with excitement to see this beauty come together. Good luck and thanks for making sure this car didn’t end up a pile of rubble in a scrap yard somewhere.
Hey, thank you!
If you ever feel like showing off, It’d be cool to see some pictures!
It sounds like your pushrods were too long. That would cause the valves to open as you are cranking down the rocker arms. Do you still have the originals for comparison?
Glenn
They were the original pushrods, and rockers. My heads were built by Butler Performance to pretty much stock specs. The problem I think is either, or a combination of, a thinner than stock head gasket and maybe, probably, the head mating surfaces were milled for trueness… Bringing the rockers down further – in essence the same as pushrods being too long.
IT SOUNDS LIKE YOU GOT IT WITH THE ENGINE RUNNING METHOD JUST DON’T TORQUE THE NUTS. LET US KNOW HOW IT GOES.